Hand-Picked Daily GUN DEALS, and Exclusive Coupons Codes >>>
We review products independently. When you buy through links on our site, we may earn a commission to help support our testing. Learn more.

1911 80% Tactical Machining Build, Part 5: Cutting the Slide Rail

Cutting 1911 Rails
Cutting 1911 Rails
Cutting the 1911 80% slide rail with Tactical Machining's jig and a 3/32 key seat cutter.
We review products independently. When you buy through links on our site, we may earn a commission to help support our testing. Learn more.
JUMP TO SECTION Jump To:

    Finally got the Tactical Machining 1911 Jig in the mail so I threw the 80% in there and got ready to cut the slide rails.

    This is probably the hardest cut so I figured I’d do it first in case I messed up.  Disclaimer again.

    Setup

    You’ll also need the bits, drill press, sliding vise, calipers, & Dykem I mentioned in Part 2.  Tighten everything down and make sure you can smoothly move the main axis of the sliding vise.
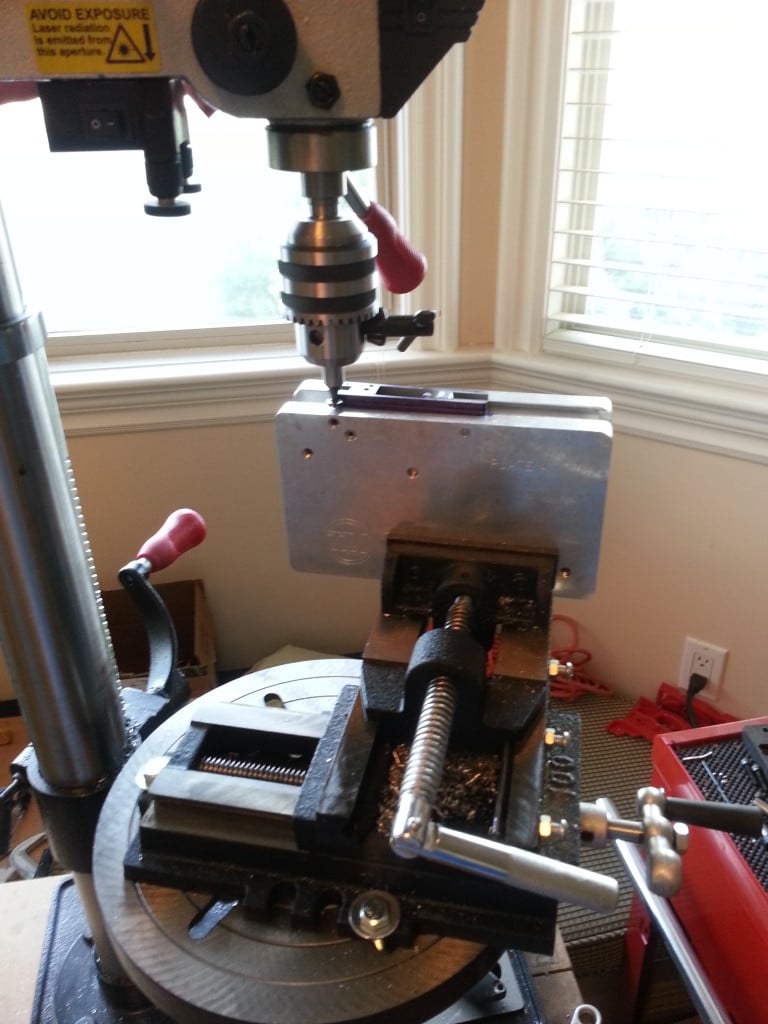
    1911 Slide Cutting Setup
    1911 Slide Cutting Setup

    Measurements

    Double check your resources and measure your slide with a good caliper.  For me, I am going to cut down .105″ from the top, and go .05″ deep.  The 3/32″ keyseat cutter comes out to be .09375″ while the slide’s thickness is .12″, so there will be some filing.  The square file in the file set tapers from around .09″ to .011″ so it should be good to go.

    Dykem & Marking

    Before you put the 80% into the jig, paint some Dykem on it.  I got excited and put it into the jig first before painting so you’ll see blue all over the jig in the pictures.  I would put it thicker next time too.  Do it in some well-ventilated place and let it dry.  Measure off .105″ on your caliper and lock it.  I put the edge of the caliper on the top of the paperweight and let the sharp edge cut into the Dykem.  Perfect!
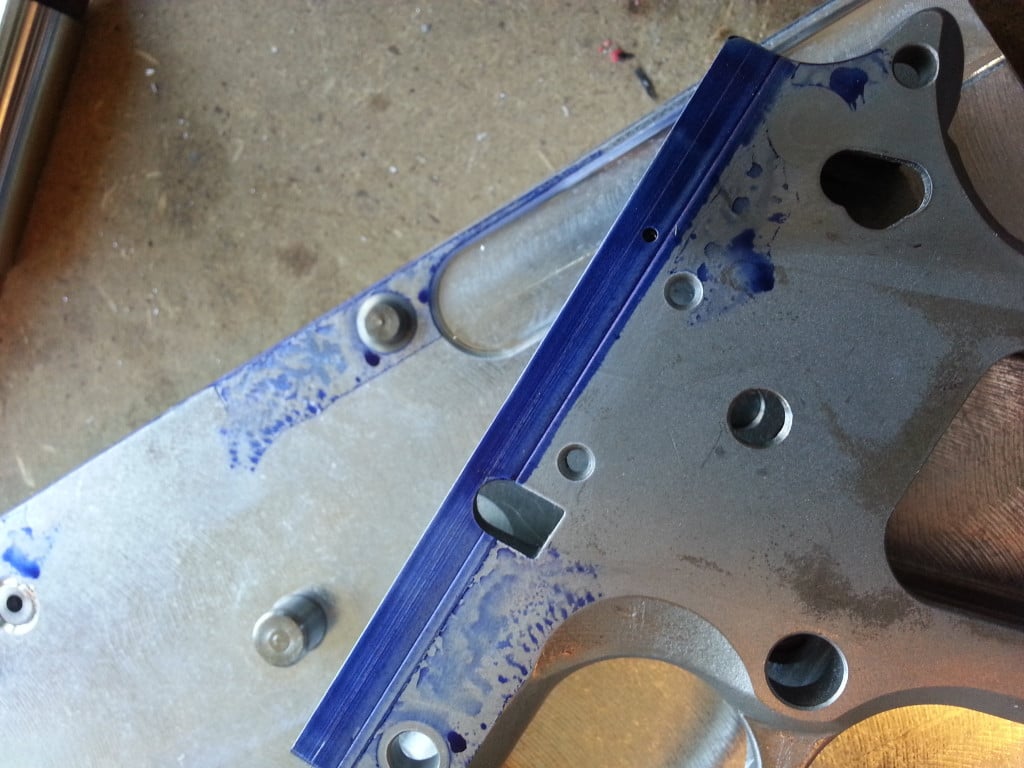
    Tactical Machining 1911 80%, Jig, and Dykem
    Tactical Machining 1911 80%, Jig, and Dykem

    Vise

    Put the jig with the 80% into your vise.  Make sure you’ll have enough space to move everything around.  Last thing you want to do is reset halfway through when your jig hits the drill press.  I’m definitely guilty…

    Get into Position

    The TM jig fits well but you cannot expect it to hold the 80% perfectly level.  Use your level and if needed, move the jig around.
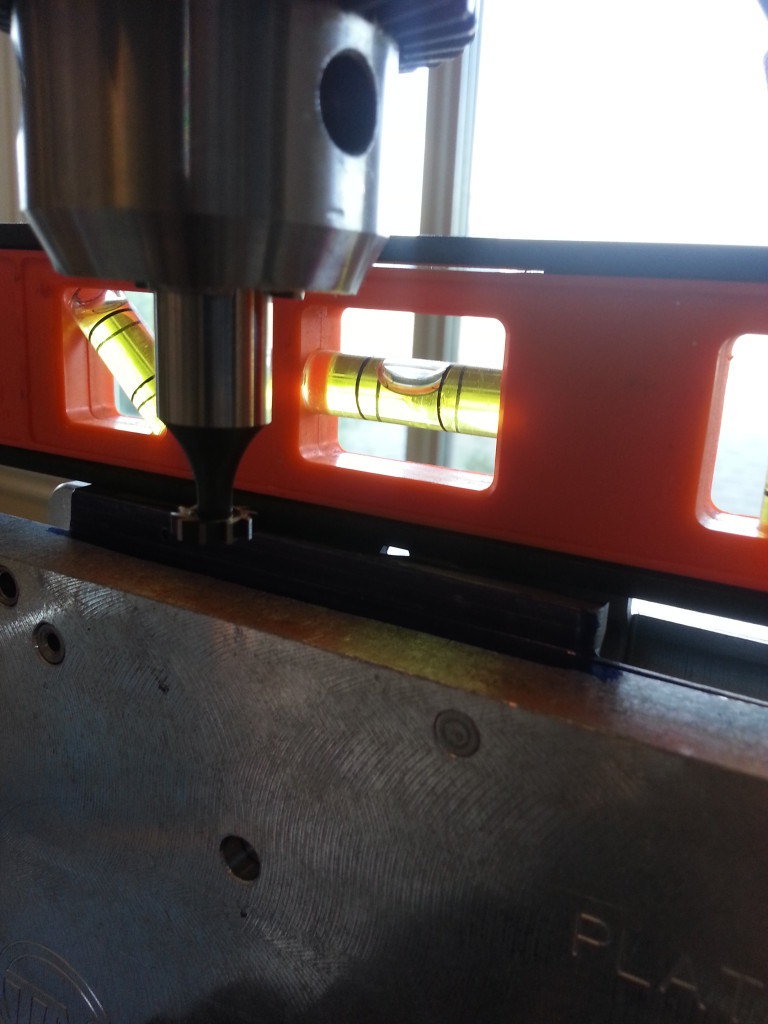
    Leveling 1911 80%
    Leveling 1911 80%

    Move everything closer to each other so you can change the height of the bit.  I prefer to move the bit up and down rather than the platform.

    Cutting

    Measure twice…or ten times, then get ready to cut.  I went for something around .04″ deep for the first cut.  Make sure you hold the jig steady and not yank it…you can see my deeper cut about half an inch from the right side.  Then just go nice and slow while holding the line you cut into the Dykem with the caliper.
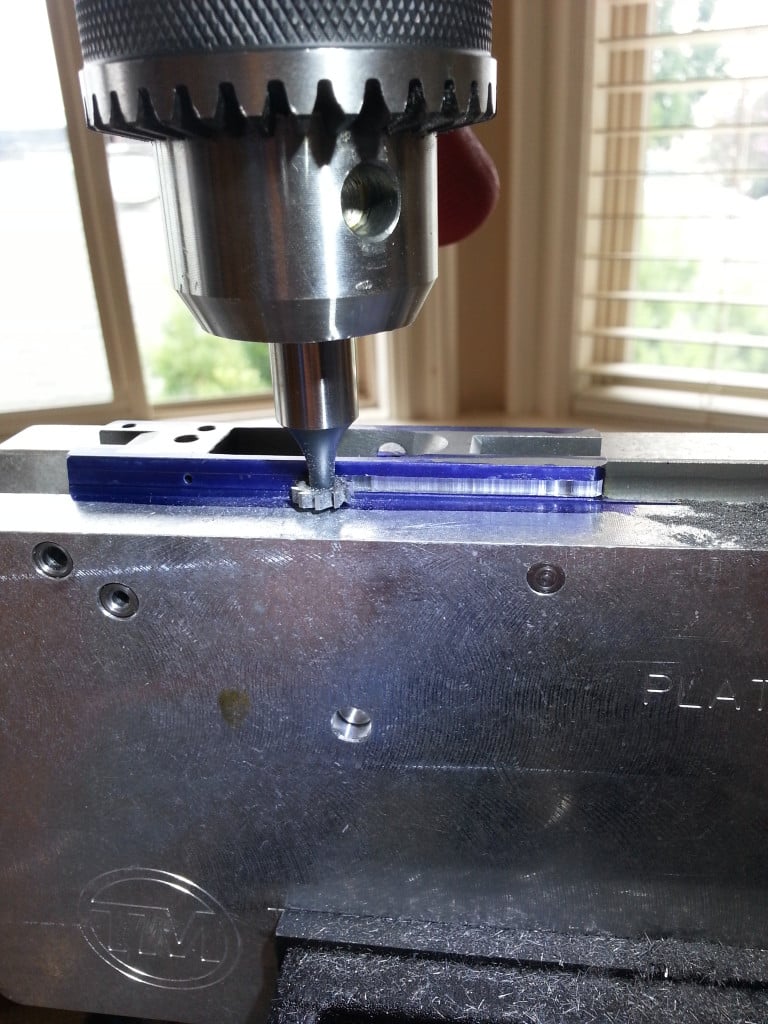
    Cutting 1911 Rails
    Cutting 1911 Rails

    Watch out when you near the end since I had the bit jump.  Nothing a little filing can’t fix!
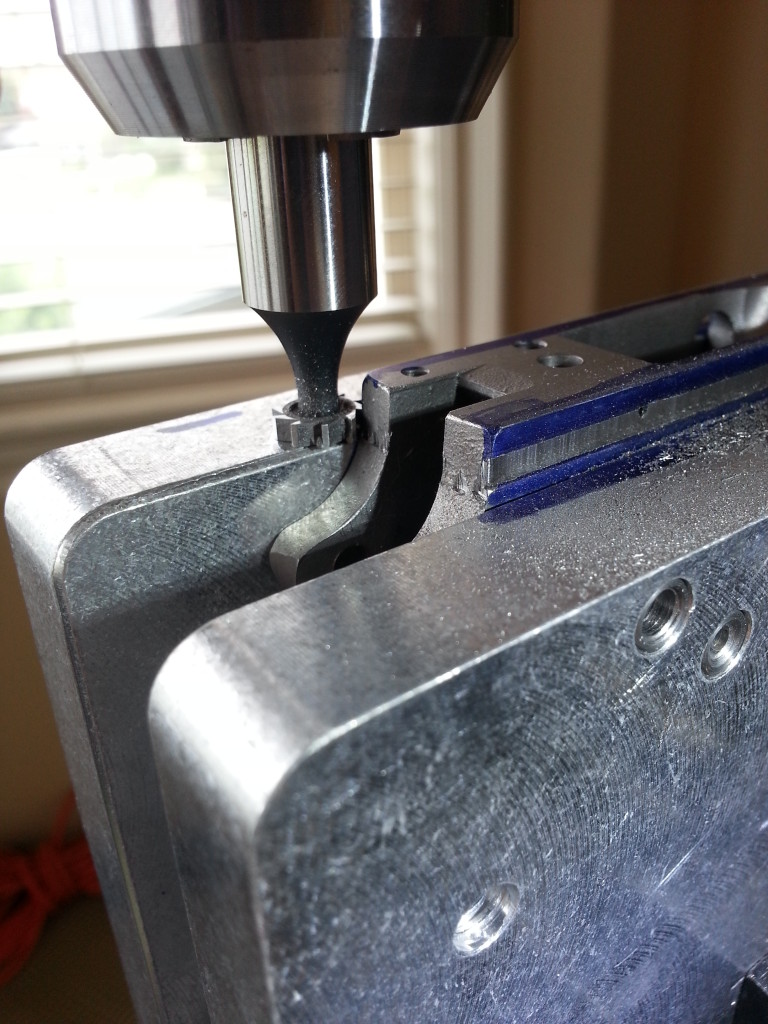
    1911 Rail Cutting Booboo
    1911 Rail Cutting Booboo

    I measured and everything was good, with just some variations from .04″ to .045,” so I went ahead with a second pass to get the proper end depth.

    I setup the other side and did the same thing.
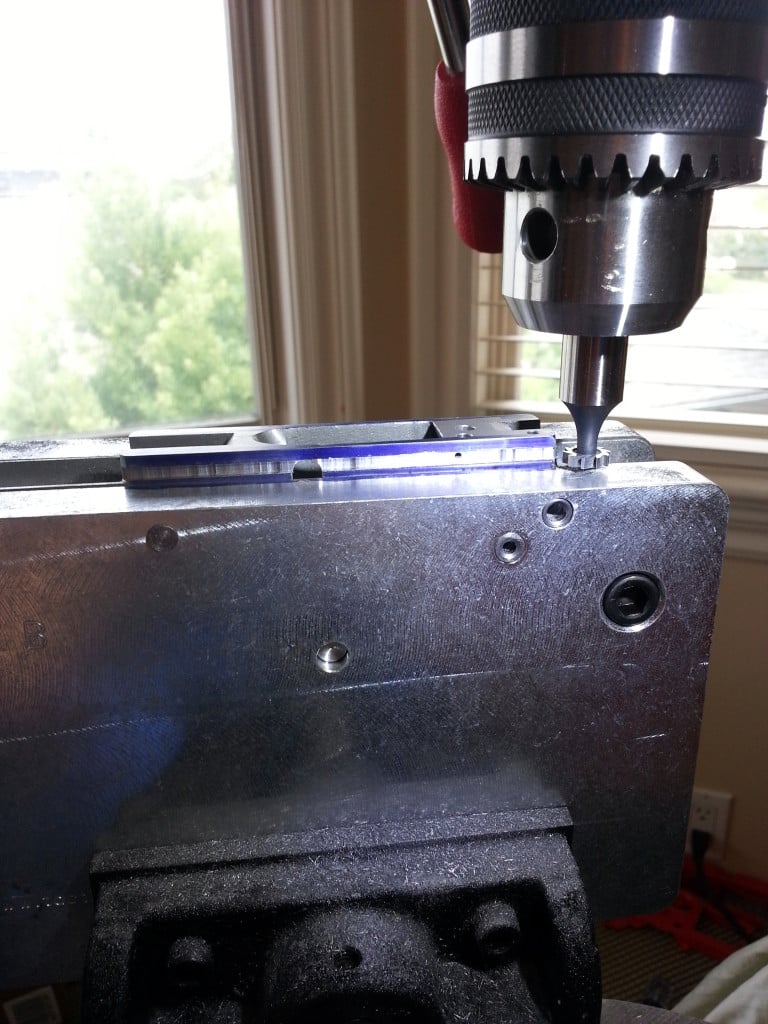
    1911 Rail Cutting Opposite Side
    1911 Rail Cutting Opposite Side

    Keep the jig as is so you can do the barrel seating cut next.  You’ll have plenty of time to file and lap the slide to fit the frame.

    Next Lesson

    Part 1: Intro (Finding the 80%)

    Part 2: Tools

    Part 3: Parts List

    Part 4: Basic Fitting

    Part 5: Cutting the Slide Rail

    Part 6: Barrel Seating

    Part 7: Hammer & Sear Pin Holes

    Part 8: Fitting the Slide

    Part 9: Assembly & Fitting

    Part 10: GunKote Application

    The Best Gun Deals, Coupons and Finds

    Subscribe to Pew Pew Tactical's sales and deals email.

    8 Leave a Reply

    • Commenter Avatar
      Bruce Henderson

      Hello,
      I was going over your article about building an 80% M1911 and, in part 4, I think, you note certain measurements as below. It would seem you mean that 0.09375 < 0.12, not 0.012 as stated. I am wrong about that?
      Thanks Bruce


      The 3/32″ keyseat cutter comes out to be .09375″ while the slide’s thickness is .012″, so there will be some filing.

      November 23, 2016 4:13 am
      • Commenter Avatar
        ehung

        Hi Bruce, I believe you are correct. Thanks for catching the mistake!

        November 24, 2016 10:29 am
    • Commenter Avatar
      Rey

      What did you use to clamp the vise to the drill press?

      October 26, 2014 1:35 am
      • Commenter Avatar
        Eric Hung

        I used a couple bolts/nuts/washers I had lying around and aligned the vise to the base of the drill press the best I could.

        October 26, 2014 6:36 am
    • Commenter Avatar
      travis

      what rpm/speed did you set your press at? also how long to just cut the rails on the press(not file too)? did your bit stay sharp?
      thanks, thats a clean build

      September 7, 2014 4:38 pm
      • Commenter Avatar
        Eric Hung

        Thanks! I set my drill press to the fastest rpm. The actual cutting was very quick, probably a few minutes each side. I spent a lot longer just double-checking the positioning of everything. I also found no problem with the bit staying sharp for a couple passes on each side.

        September 8, 2014 1:13 am
    • Commenter Avatar
      Drew

      Hi Eric,
      Where did you get specs for cutting the rails?

      Thank you

      July 24, 2014 8:49 pm
      • Commenter Avatar
        Eric Hung

        I got them from my Kuhnhausen book, but there's this link (choose 1911-A1 blueprints).

        But the best is to start there and measure your actual slide since that is what has to fit onto the receiver.

        July 25, 2014 12:11 am
    Join the community! Log in
    Please provide a valid email address.
    Password is required.
    or
    Register
    Please provide a valid display name.
    Please provide a valid email address.
    The password should contain at least 8 characters with at least one number or special character.
    Please accept in order to continue.
    By unsubscribing, you will not be able to access exclusive training courses in your profile. You will still be able to save and access your products and articles.
    or
    Trouble logging in?
    Type your email address and we’ll send you a link to reset your password.
    Please provide a valid email.
    Password
    Type your new password and hit button below to confirm it.
    Field is required.
    Account already exists
    We already have an account registered for email address () which is linked to your Facebook account.
    To log in type your Pew Pew Meter password below.
    Field is required.
    Account already exists
    We noticed that you have previously logged in with your Account which is linked to the same email address () - we can link both of your accounts together.
    In order to link your accounts, hit button below and log in to your Account with the same email as above.

    Account in Pew Pew Tactical means more.

    Login or create a free account to get the following
    Access and save hundreds of reviews, gun guides, and articles!
    Find the best daily deals on guns, gear, and ammo
    Manage your newsletter subscriptions and comments
    pew pew tactical logo

    new here?

    Personalize your experience.
    Select what level shooter you are!

    pew pew tactical logo

    level up your gun knowledge

    Thanks! We'll send you the latest guides and training tips geared towards your level.

    pew pew tactical logo

    welcome!

    You'll now receive newsletters of our best articles on techniques, guns & gear.

    $47 value

    yours free!

    targets targets
    free

    practice targets

    printer icon printable

    our 9 favorite targets and drills

    free

    practice targets

    printer icon printable

    enter your email to download

    We'll only use the information provided according to our privacy policy.

    success icon

    Ready to Download

    Click below to begin your download

    download pdf